
Virtual Disk can set private and public directories, achieve the server resources sharing with client's data, provide write protection
for virtual disks, don’t worry about affected by the client viruses, deleted and formatted operations .
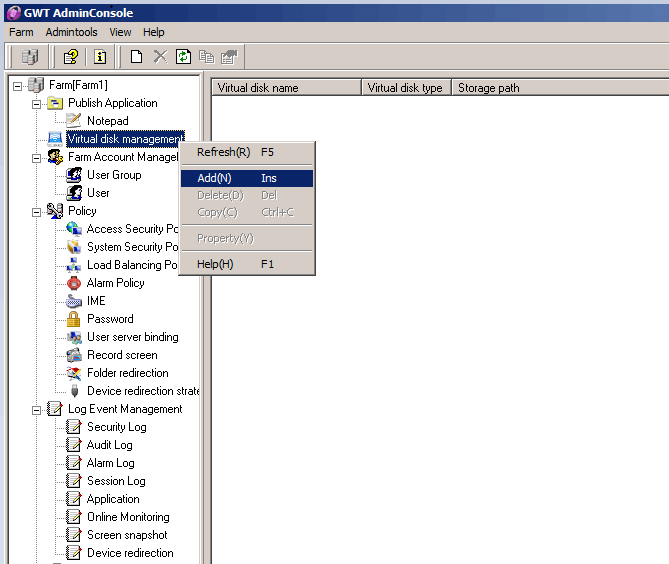
New virtual disk, click the left function tree "virtual disk", right-click to add the following figures:

Enter the virtual disk configuration interface. Fill in the Display name and Description of the disk, as shown below:

Click【Next】, choose the disk can set to private disk or public disk, where you can publish a local directory or network resources, such as
selecting a local directory. Click on the "Select" to select the folder you want to publish path, as shown below:

If you choose to network resources, you need to fill in the path of network resources and network user name and password, as shown below:

After you configure the local directory path or network resource configuration items, click 【Next】. Then enter the setting icon interface. You
can use the system default icons according to their preferences, as shown below:
![]()
After selecting the icon, click【Next】, turn into the server selection and user selection interface. Here you can refer to Publish Application
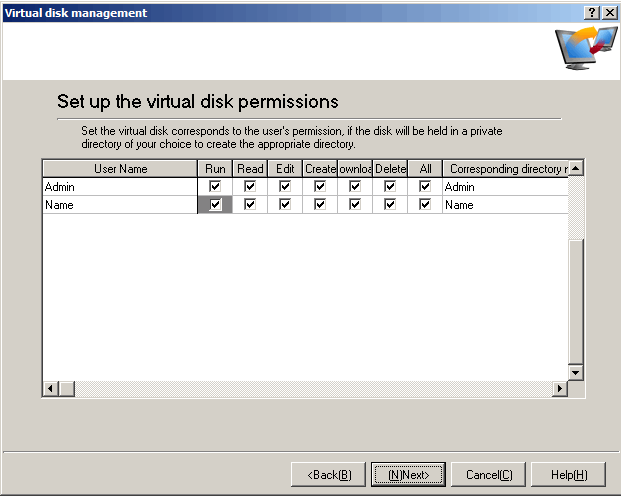
section to configure. After the completion of selecting the server and the user, enter the disk permissions selection interface, as shown below:

When you publish a private disk, the default for all users has permission to run, read and delete. While allocating the public disk, only
administrators “Admin account” by default have all permissions. Other users only possess of the default permissions to read and download.
You can also configure the permission for its specific user. After configuration is complete, click 【Next】, enter the configuration wizard to
complete the confirmation interface. If you want to change the configuration, click "Back" to gradually re-configuration, or click the Finish button
to complete the final configuration.
Now you can see that you have configured the virtual disk in a virtual disk directory, as shown below:

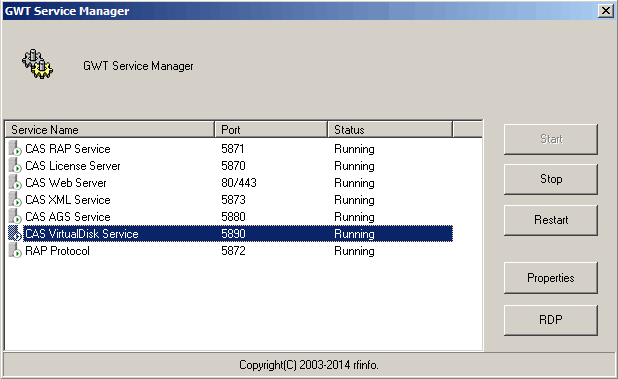
Note: After the completion of the virtual disk configuration, you need to open the corresponding service port controlled by router. The default is
5890. You can start
menu and view or change in the GWT
Virtual Application System management tool, as shown below:

If you want to re-configure the virtual disk, you can select the existing virtual disk right-click property. or double-click the virtual disk, then enter
the configuration interface of the virtual disk, and similar to create a virtual disk.
If you want to delete an existing virtual disk, you can right click and select delete.